Planning Budget: In this planning budget we just plan the expenditures but there will not be any control over it. It's is prepared for comparing the actual with budget figures to know the variance.
Funding Budget: In this funding budget we can plan the expenditure or Revenue and also we can keep the control on budget journal amount. Here, we required to create budget journal for defining budget amount. It will control the actual transaction by using fund check methods(None, absolute, Advisory).
PlanningControlBudget JournalPlanningYNNFundingYYY
1. Open
2. Current
3. Freeze (Close)
First period in the organization is with current Status when define the budget next time you will get only Open Status. Freeze Status means closing of the budget.
Fund Check levels: There are three types for fund check level.
None - It is for planning budget
Absolute - We can’t enter amount beyond the budget amount.
Advisory – It will pop up a warning message when we enter amount beyond budget amount.
Setup Steps:
1. Create Reserve for encumbrance account and expenses accounts in account segment values
2. Enable budgetary control at Ledger
3. Define Budget
4. Define Budget organization
5. Create Budget Journals
6. Query the budget journals and post
7. Create journal entry using budget account and test it.
Let us see, how to configure setup steps for funding budget
Step 1: Define Reserve for encumbrance (Ownership) A/c at account segment level.

Step 2: Enable Budget control at ledger Level.
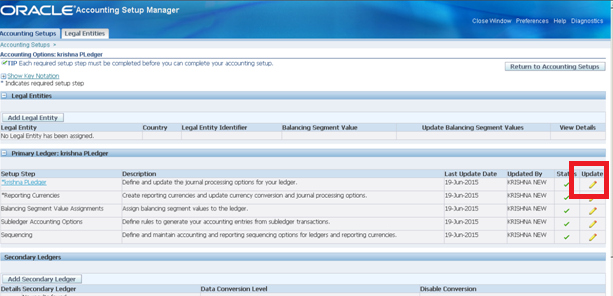
Navigation: Setup --> Financial --> Accounting Setup Manager
--> Accounting Setup.
Query your ledger and click on Update accounting options
Query your ledger and click on Update accounting options

Go to primary ledger region and click on Update
Now go to Advance Option window and fill budgetary control regions details like
Enable Budgetary Control
Enable Budget Journal
Enter Account code combination for Reserve for encumbrance.
Enable Budgetary Control
Enable Budget Journal
Enter Account code combination for Reserve for encumbrance.

Now, click on Finish and check for the Confirmation note.
Step 3: Define Budget.
Navigation: Budget --> Define --> Budget.
Enter Budget name and description
Enter Budget name and description
Choose your Ledger
Status: Current
Enable check box “Require budget Journals”
Choose Budget periods: First and Last
Click on “Open Next Year”


Go to View --> Request and ensure request completed normal

Note: Now, Query the Budget and you can see last open year field is updated.
Step 4: Define Budget organization.
Using these Budget organization form we can define name of the budget and descriptions and choose the display sequence and Set password (Optional) and also used to mention accounts
which are using for budget planning and Budget control options.
Navigation: Budget --> Define --> Organisation.
Name your Budget Organization & Description
Choose ledger
Select Ordering segment
Choose Display Sequence
Enter Effective dates

Click on "Ranges" button
Enter Line: 1
Choose Accounts for Low and High
Type: Entered
Currency: INR
Now Status is adding

Click on “Range Assignments” and Choose Accounts individually

Close this window & Click on “Budgetary Control” button

Save and close this window
Go to View --> Request and Ensure program completed normal

Step 5: Create Budget Journal.
Navigation: Budget --> Define --> Journal.
Choose “Budget organization”


Review Journal

Now, Post all unposted budget journals

Now, Let's test the budget concept by entering more than Planned amount.

System displayed a note message stating that this transaction failed fund check. It means we can't post this journal. We need to enter amount less than the budget/Planned amount.
Note: To Check the funds availability Navigate to Inquiry --> Funds window.
Choose “Budget organization”
Choose “Accounting periods”
Go to “Work sheet mode”
Choose Accounts period from and to
Select one by one account

Click on “Budget Rules” button and choose rule and amount.


Say "Apply".
Note: You have do the same for all accounts

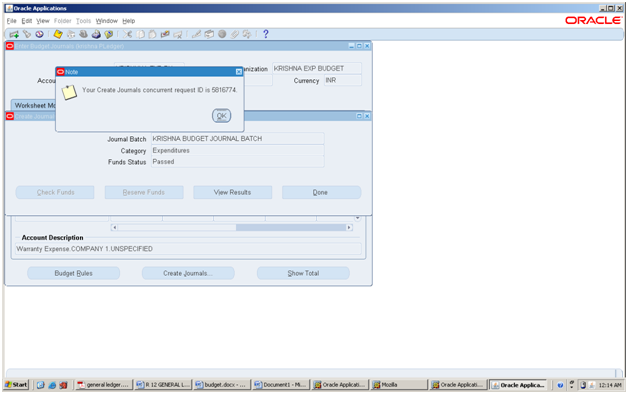
Now click on "Create Journal" button
Enter Journal Batch name
Choose Category: Expenditures
Funds status: Required

Click on “Check Funds”

Click on “Reserve Funds”


Step 6: Query
the Unposted budget journals and post
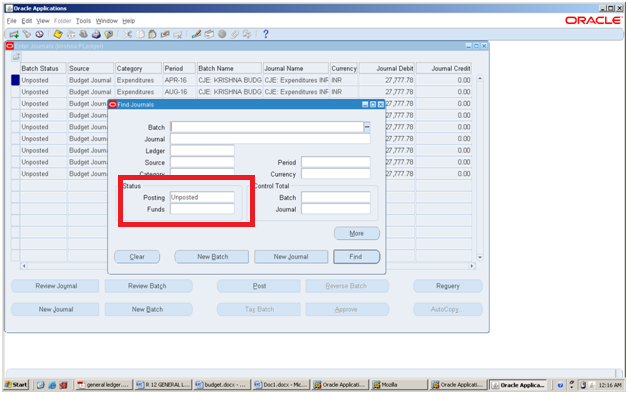
Navigation: Journals --> Enter.
Choose Status Posting as " Unposted" and click on find button
Choose Status Posting as " Unposted" and click on find button
See the unposted budget journal.
Review Journal
You can see:
Journal name: CJE
Balance type: Budget
Only debit lines created in journal entry 
Now, Post all unposted budget journals
Post the Journal entry
Go to View --> Request
Ensure Journal posting program completed normal
Now, Let's test the budget concept by entering more than Planned amount.
Step 7: Create
Journal entry using budget account
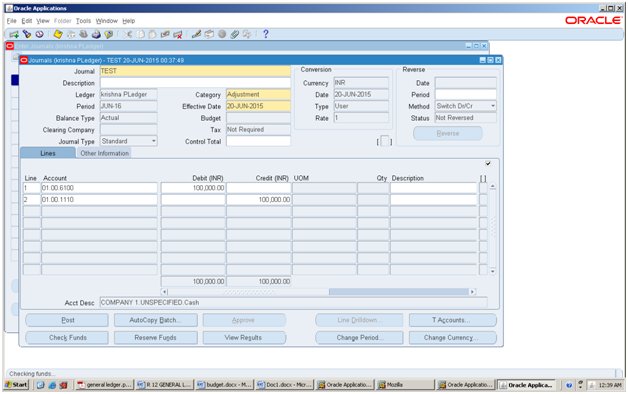
Navigation: Journals --> Enter
Say “new Journal”
Category: Expenditures
Click on "Check funds"

System displayed a note message stating that this transaction failed fund check. It means we can't post this journal. We need to enter amount less than the budget/Planned amount.
Note: To Check the funds availability Navigate to Inquiry --> Funds window.


